

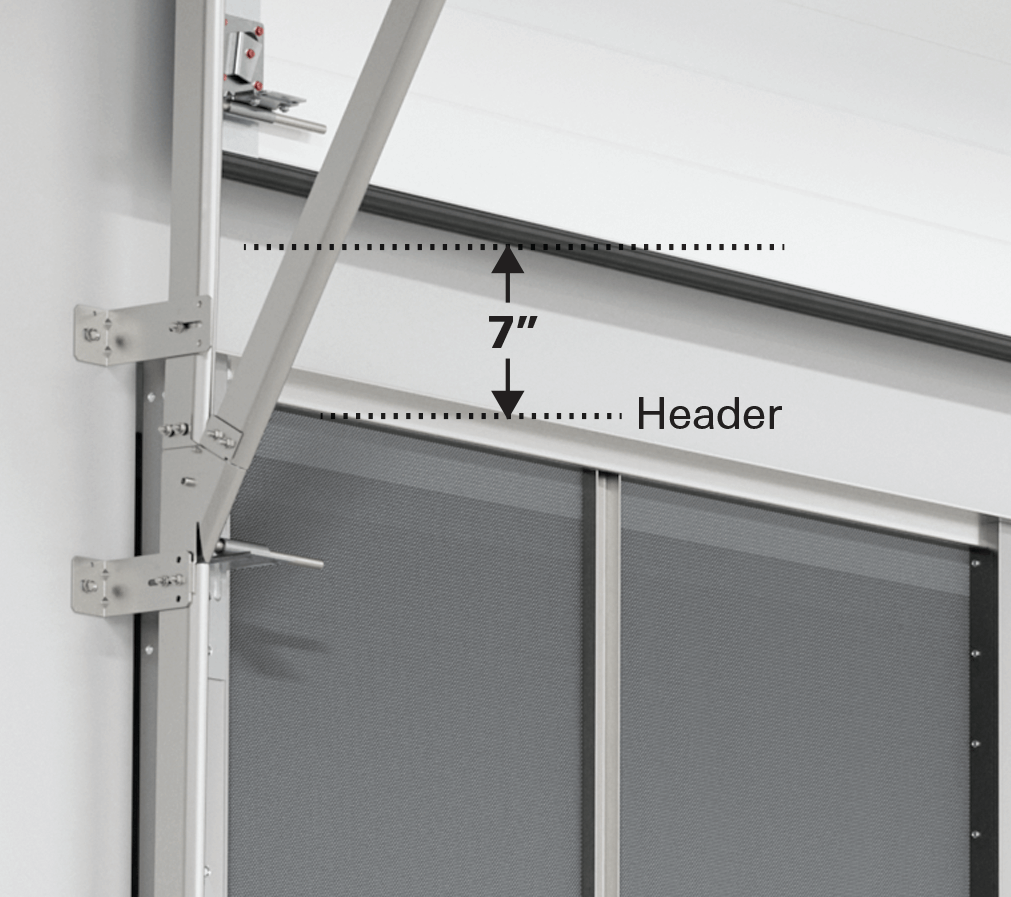
Existing door should stop 7” above the header to allow clear travel of the Rasco door.
If you skip this step:
The doors will collide.
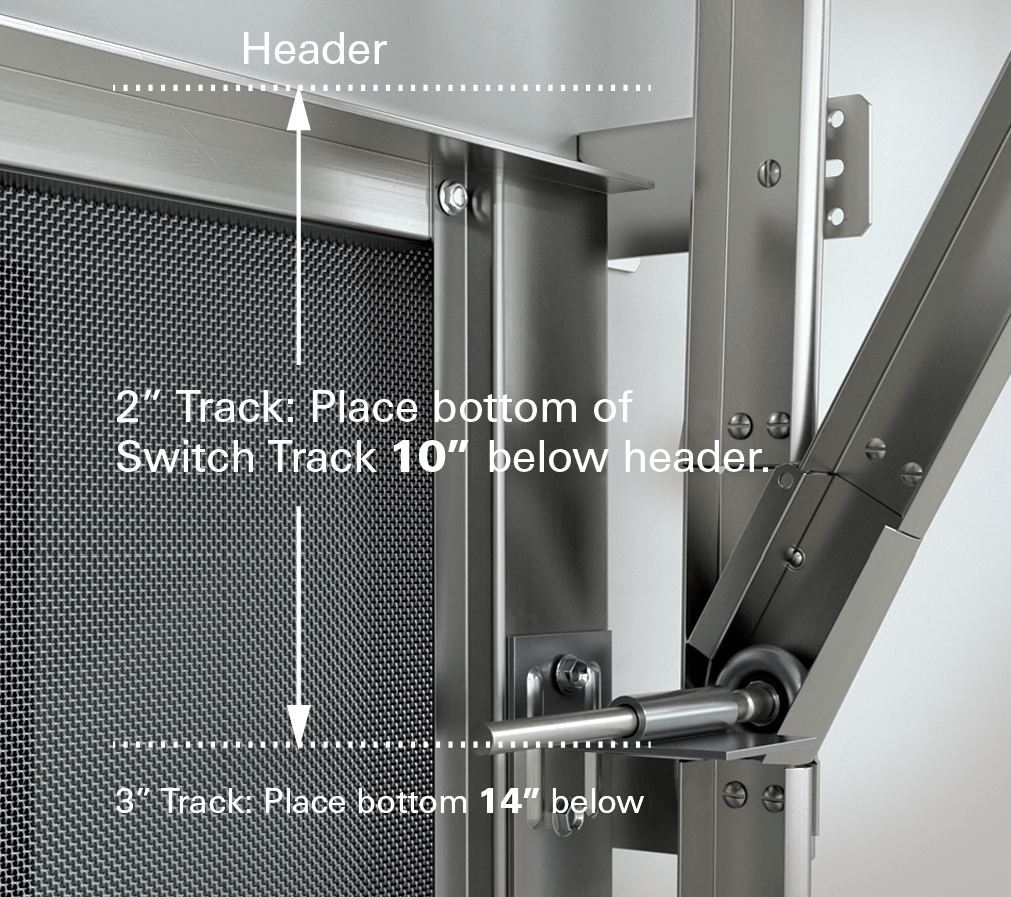
It is crucial to measure from door header to the bottom of the switch track.
If you skip this step:
You may overstress the top roller and cause them to derail.
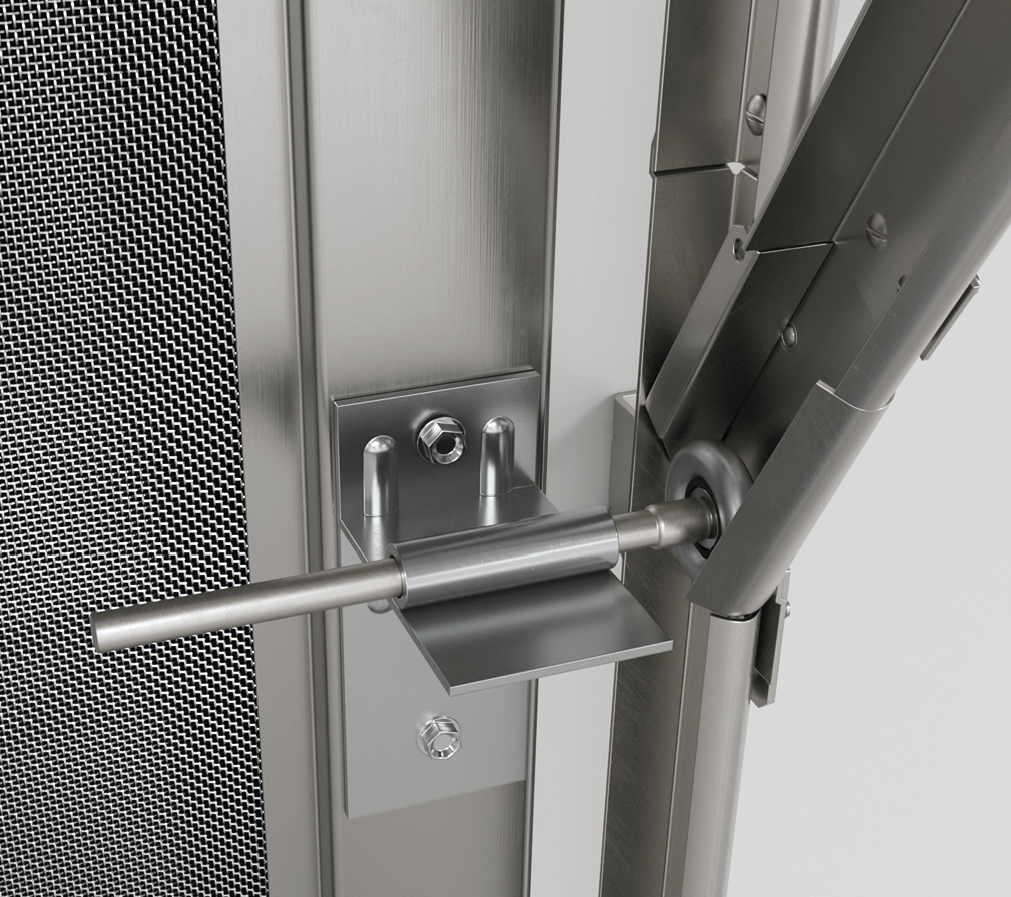
Track bolt holes on lower vertical will need to be redrilled through the side plates.
If you skip this step:
You will not be able to attach the side plates.
Motorizing Our Door. Rasco Doors sit further from the wall than your existing door.
If you skip this step:
The motor won’t operate correctly.
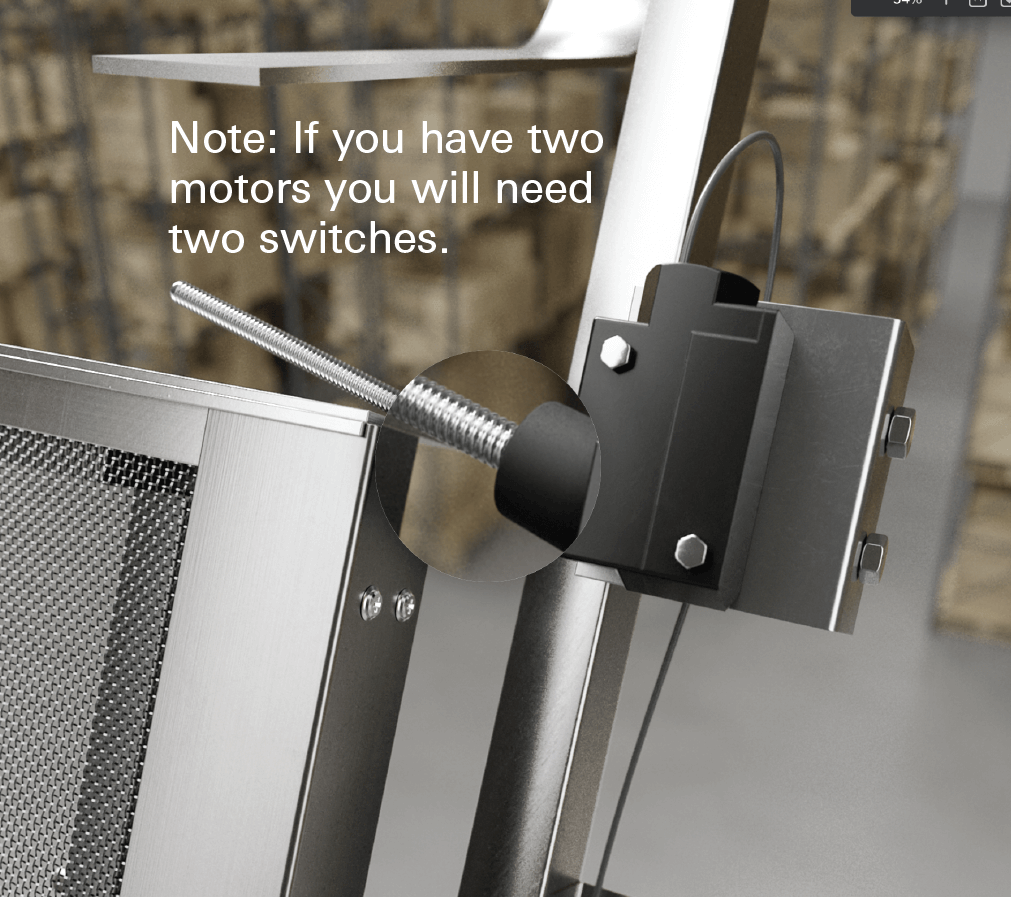
If your existing, solid door is motorized you will need an electronic-interlock switch.
If you skip this step:
The doors will collide.
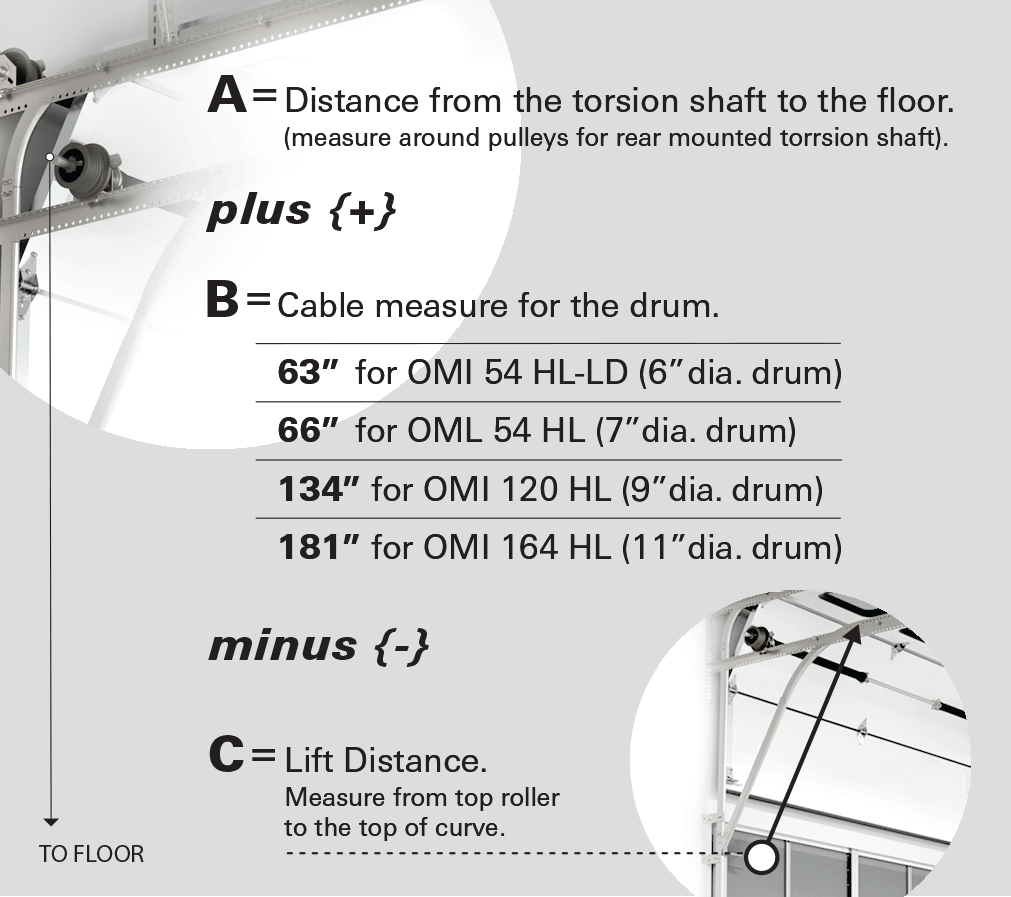
Don’t guess on cable length or use a standard “wrap and a half”of cable. Use A+B–C.
If you skip this step:
Door will go up and stop, or travel to a certain point and then just take off.


